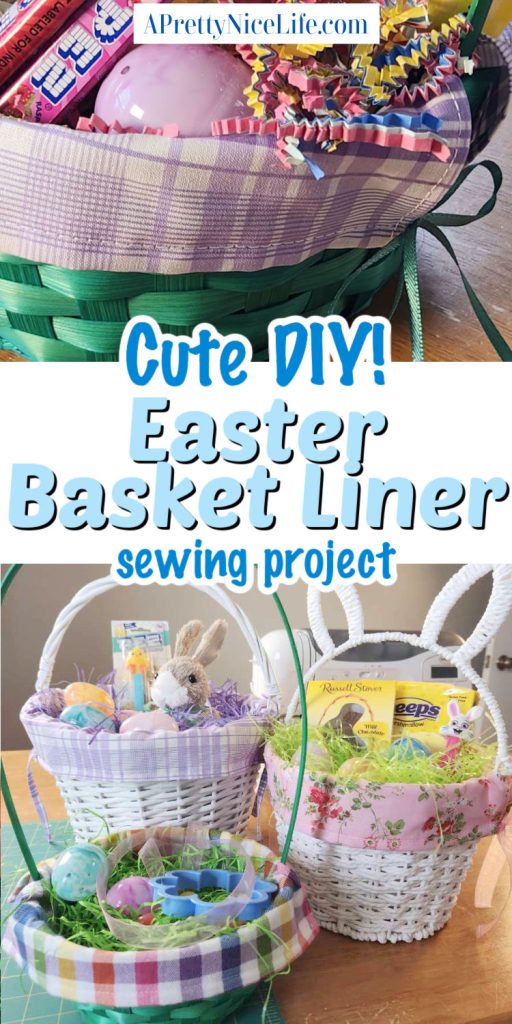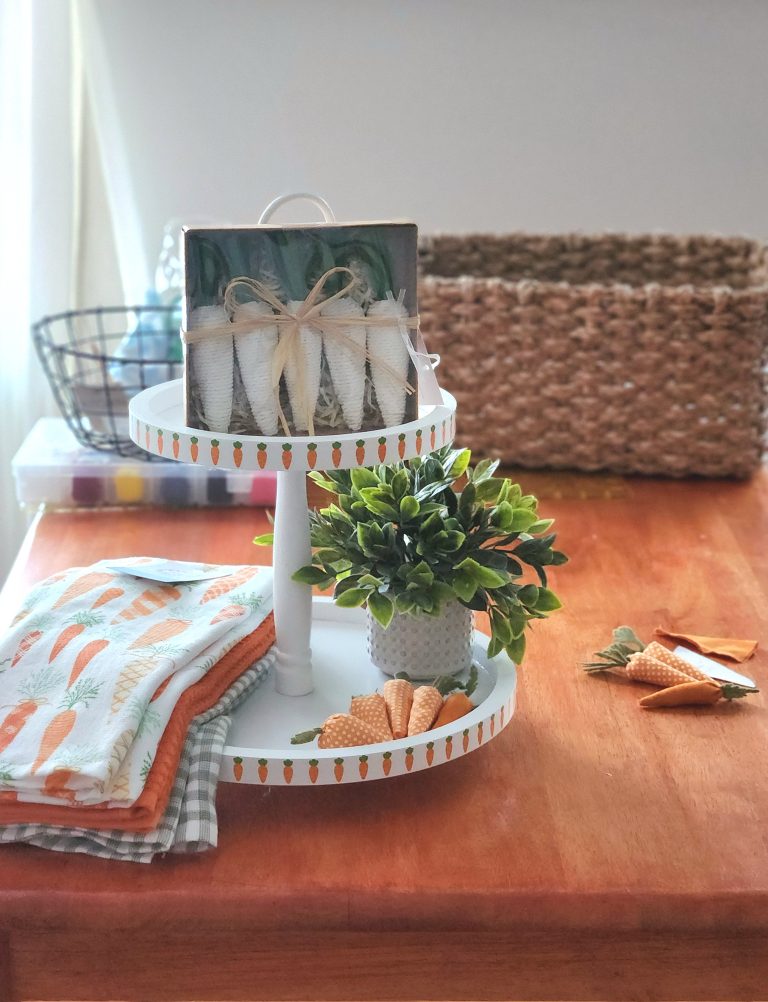


I have always loved the idea of sewing a fabric liner for Easter baskets. It just levels up the cuteness by a lot. Learn how to make your own Easter basket liner sewing pattern and you can make new ones for every season! You can buy lined baskets, of course, but they are more expensive and often the liners are pretty cheap, thin fabric. (They are pretty cute, I’ll admit. But I don’t want to pay so much for such poor quality.)
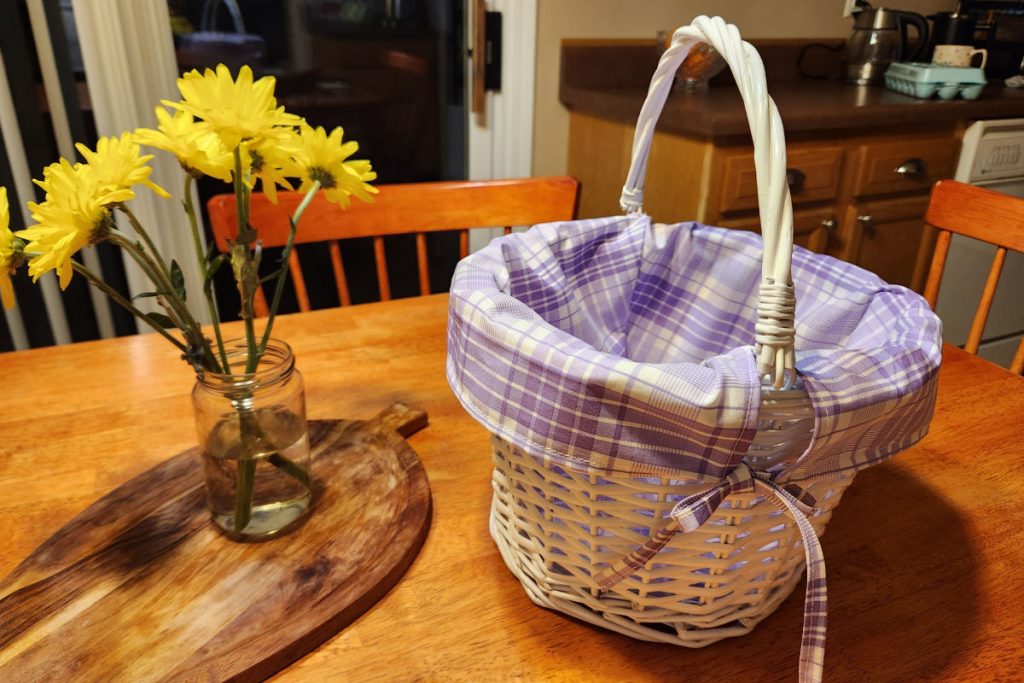
So it’s been on my to-do list for a loooong time to make a custom pattern for one of our Easter baskets. I finally did.
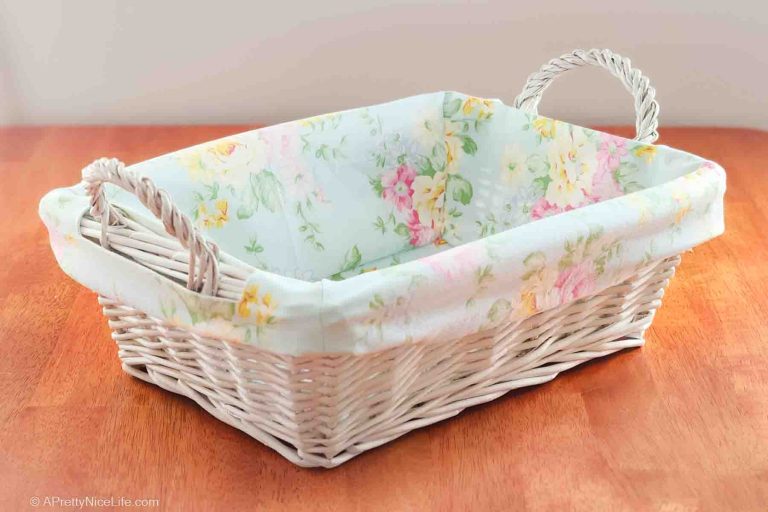
This method gives you a tailored, fitted liner. There’s no gathering stitch on this one like there was on my oval basket liner. You’ll just get a clean, pretty liner you sewed yourself, from cute fabric you actually like.
Fair warning: this job takes math. But don’t worry if math isn’t your thing. If I can do it, anyone can do it! I’ll walk you through every calculation, step by step, so you know exactly what to cut.
Materials Needed to Make an Easter Basket Liner
Links provided to materials will be affiliate links whenever possible. As an Amazon associate, I earn from qualifying purchases.
- Your round basket with handles
- Cotton fabric (I used a plaid quilting cotton from Walmart — about half a yard was plenty for my basket)
- A flexible measuring tape OR a piece of string and a ruler
- Scissors or a rotary cutter, ruler, and cutting mat
- Sewing machine
- Pins or clips (double-sided sewing tape/DST is a great option for pinning the circle to the side panels)
- Iron and ironing board
- Fabric marking pen or chalk
- Ribbon or fabric strips for ties (4 equal pieces)
How to Sew a Fabric Easter Basket Liner
Process Overview:
I’m not gonna lie: the directions look intimidating at first, but you’re just doing three things, basically:
- Measuring your basket
- Cutting the fabric
- Sewing your basket liner
Step 1: Measure Your Basket
Part of the beauty of baskets is the woven, natural texture, but that also means they’re imperfect. Your measurements for your basket liner will be approximate. And that’s okay! You just need four measurements:
- Inside diameter at the bottom. Measure straight across the inside bottom of the basket.
- Top diameter. Measure straight across the opening at the top from one side to the other.
- Basket height. Measure straight up the inside wall of the basket to the top rim.
- Overhang. How far you want the liner to drape over the outside. About 2 to 2.5 inches is typical and looks nice, depending on the size of the basket.
Tip: If you don’t have a flexible measuring tape, use a piece of string to measure around curves, then lay the string flat against a ruler to get your measurement.
Step 2: Calculate Your Cuts
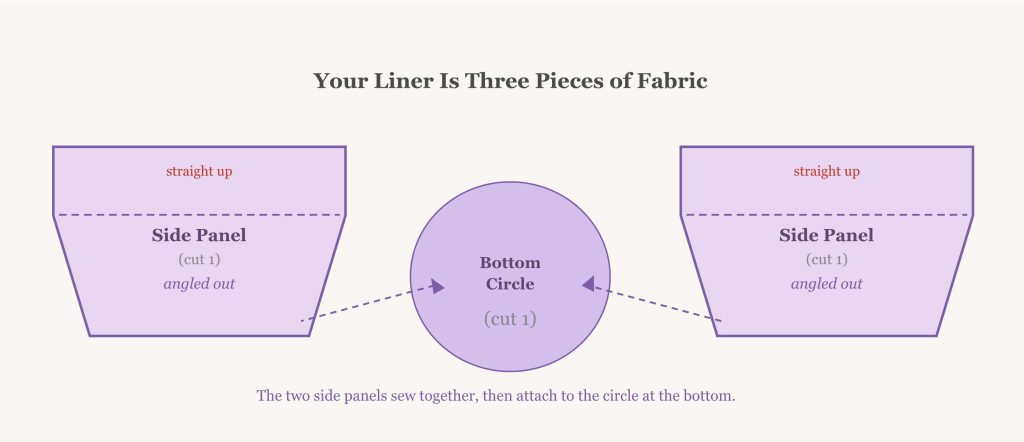
Your liner has three pieces of fabric: one circle (the bottom) and two side panels. Here’s how to calculate the sizes you need for each piece of fabric in order to make the fitted basket liner.
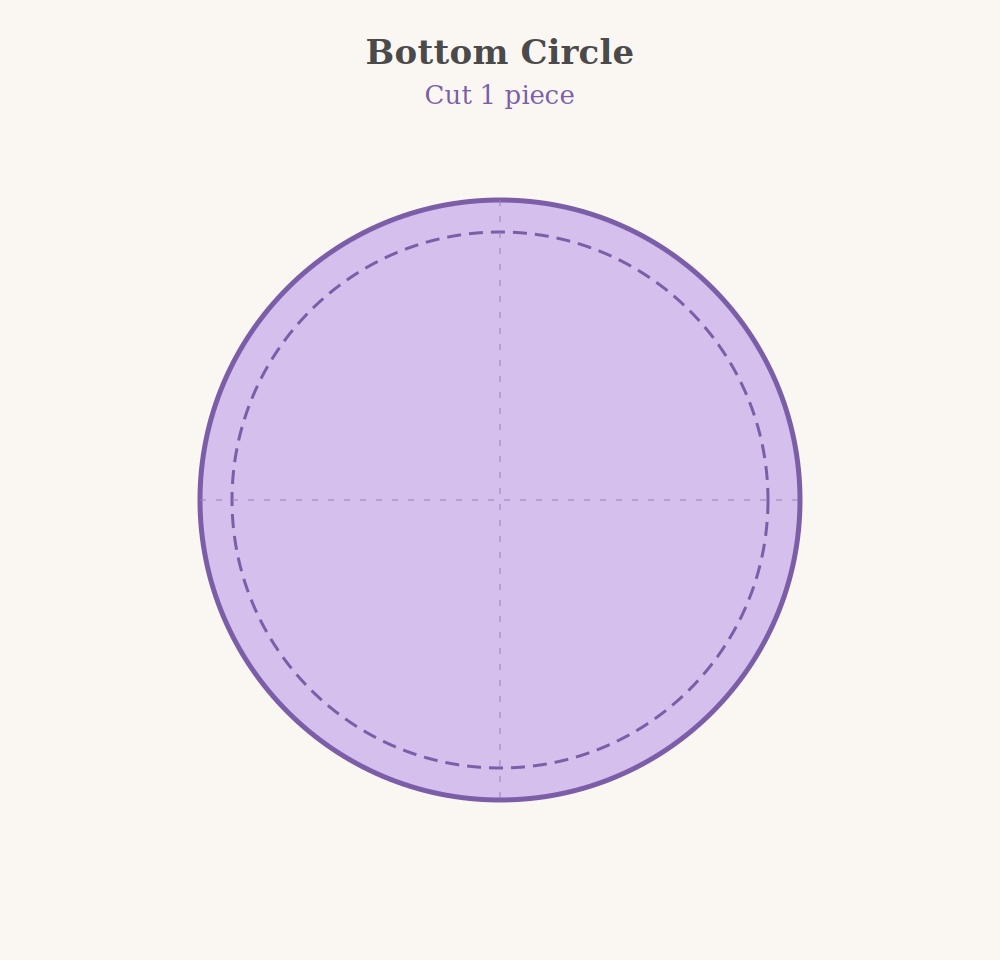
The Circle
The bottom circle is the foundation of your liner. It’s important to measure the inside bottom, or else your liner will be too big.
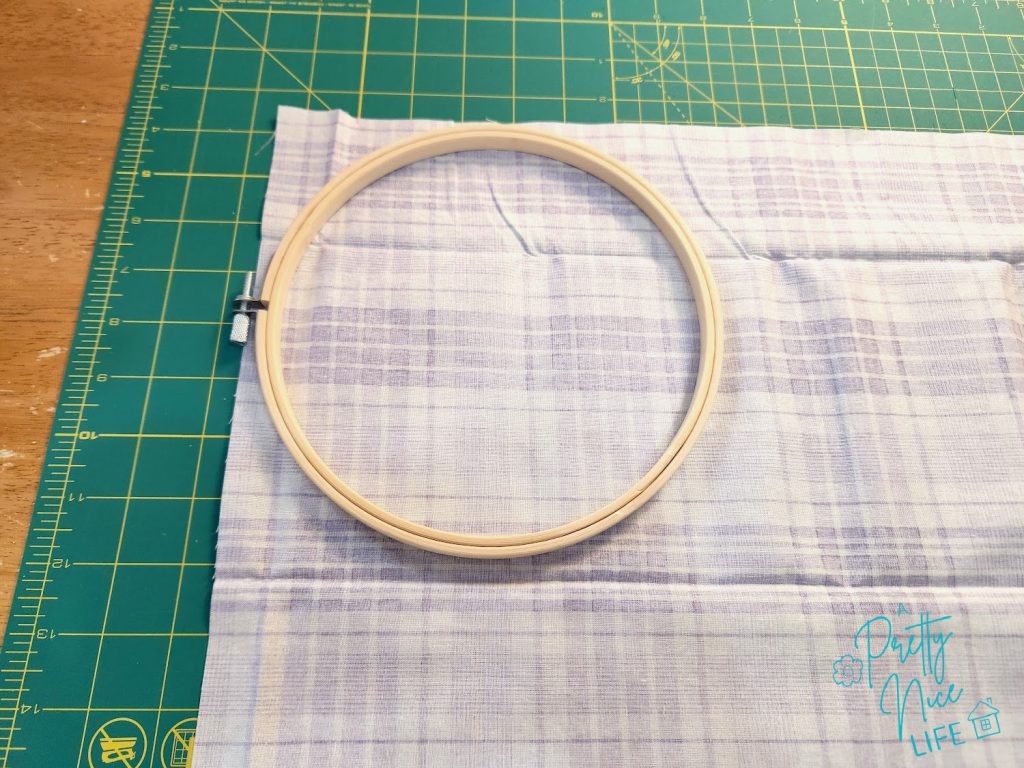
Tip: An embroidery hoop makes a perfect circle template! Other options are plates, cake or pizza pans, pan lids, etc. Find something close to your target size and trace it.
Fold your circle & make crease lines
To find the center of your circle and make sewing easier, fold it in half, matching up the edges, and then in half again and press with an iron. This will help later. Those fold lines will be your guide when pinning the side panels.
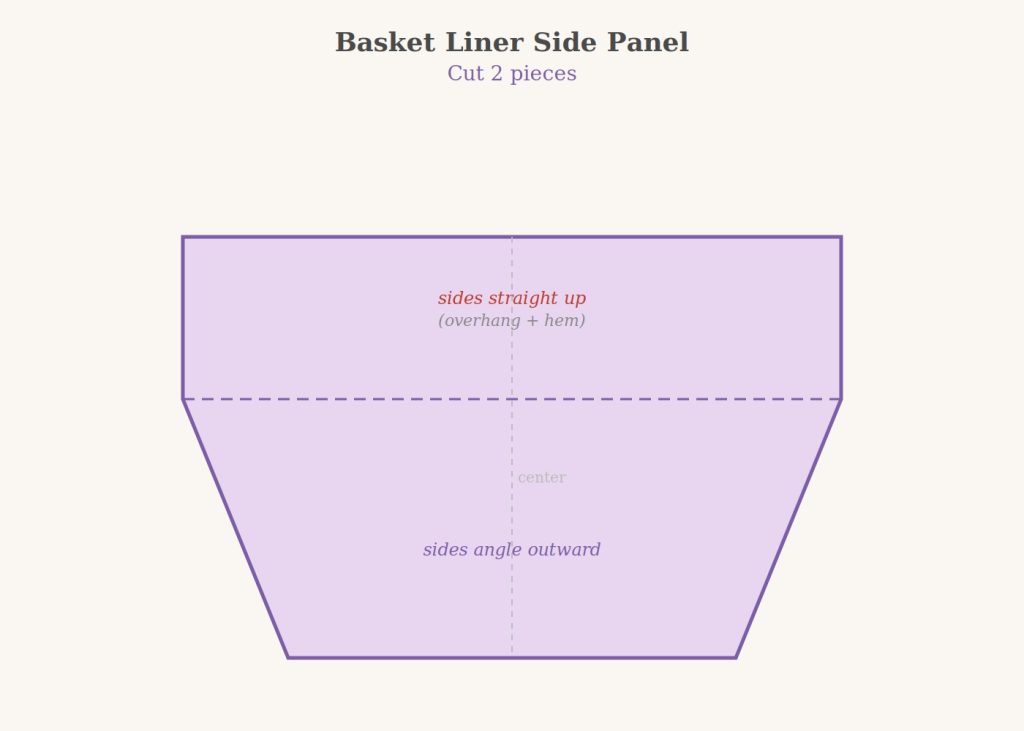
Side Panels
Most baskets flare outward so they are wider at the top than the bottom. To account for this, your two side panels will be wider at the top than they are at the bottom. This will give your liner a nice, tailored fit.
To accommodate for your Easter basket handles, you’ll sew ties or ribbons at the top of where the two side panels open around the handle.
Calculate your side panel measurements:
Okay, this is where it gets “mathy” but hang with me — it’s really just a few simple steps. You only have to do this once, then you can reuse your numbers forever to make linings for this basket.
You’ll end up with four measurements (T, H, B, and the transition line). Let’s start with Measurement T — the top width of each side panel.
Measurement T (Top Width)
- Multiply the top diameter by 3.14 to find the circumference: 10 x 3.14 = 31.4″ — round up to 31½”
- Divide by 2 for two panels: 31.5 ÷ 2 = 15.75″ which is 15¾”
- Add ¾” for seam allowances: 15.75 + .75 = 16.5 which is 16½”
Your Measurement T = ____________________________
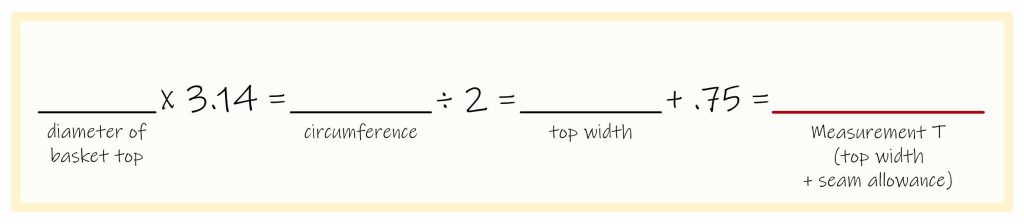
Use the example above to figure how wide to make the top of each side panel
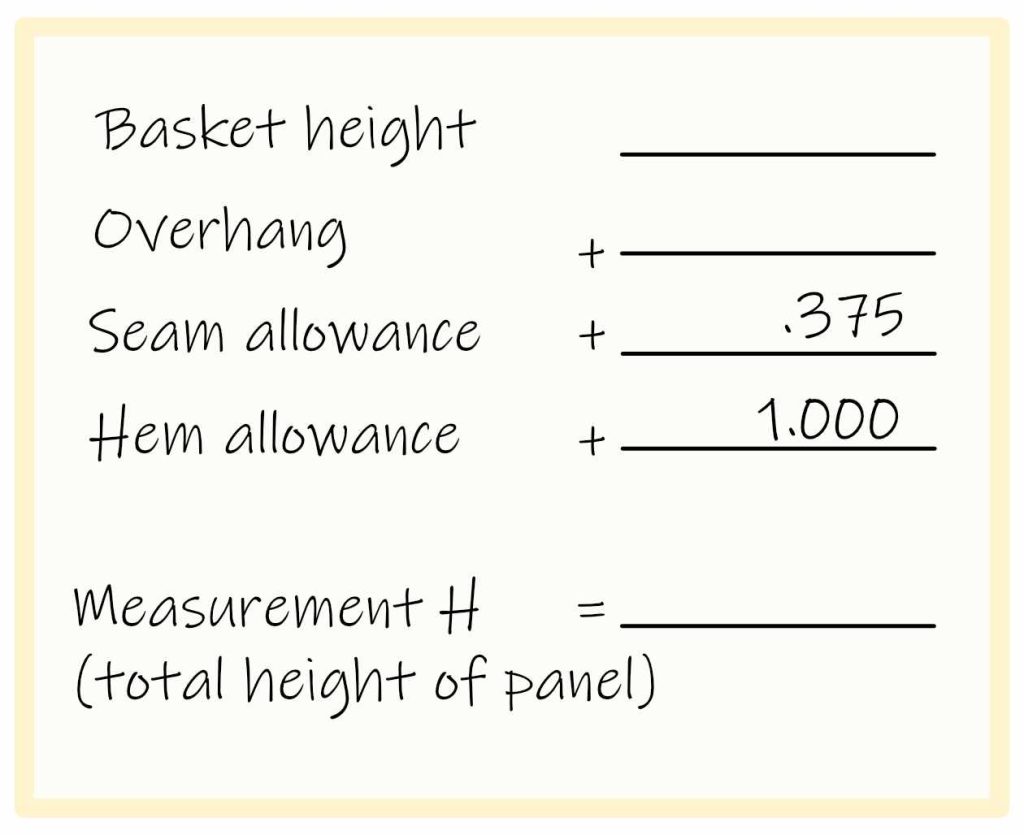
Measurement H (Panel Height)
- Start with the basket height: 6″
- Add your overhang: 6 + 2 = 8″
- Add 3/8″ for the bottom seam allowance: 8 + .375 = 8.375″ which is 8⅜”
- Add 1″ for the top hem: 8.375 + 1 = 9.375″ which is 9⅜”
Your Measurement H = ____________________________
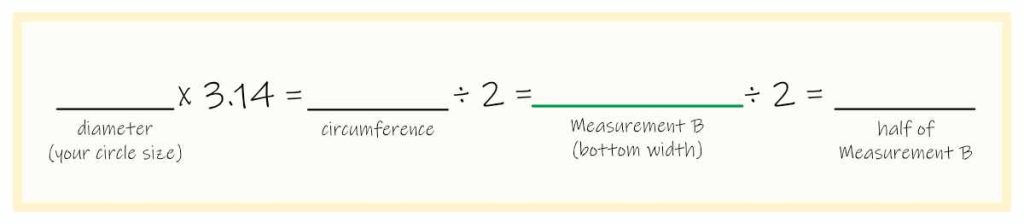
Measurement B (Bottom Width)
For this measurement, we don’t need to add the 3/8″ seam allowance, because we’re actually borrowing that from the circle when we sew it.
- Multiply the bottom diameter by 3.14 to find the circumference: 7 × 3.14 = 21.98″ — round to 22″
- Divide by 2 for two panels: 22 ÷ 2 = 11″
Your Measurement B = ____________________________
Note: After you find Measurement B, you want to divide it in half again because you’ll be cutting the fabric folded later on in the process.
Use the example above to figure how wide to make the bottom of each side panel
The Transition Line
The transition line is where your side panel starts to angle inward toward the bottom. You’ll mark this line on your fabric and use it as your cutting and sewing guide.
- Start with your overhang: 2″
- Add 1″ for the top hem: 2 + 1 = 3″
- Add 1″ buffer for the basket rim: 3 + 1 = 4″
Measure down from the top edge of your fabric rectangle and mark your transition line.
Your Transition Line = ____________________________
Cutting Your Fabric:
Use your measurements to cut your fabric pieces.
Tip: For the side panels, you can layer two pieces of fabric on top of each other and cut both side panels at once, saving time and ensuring they’re identical.
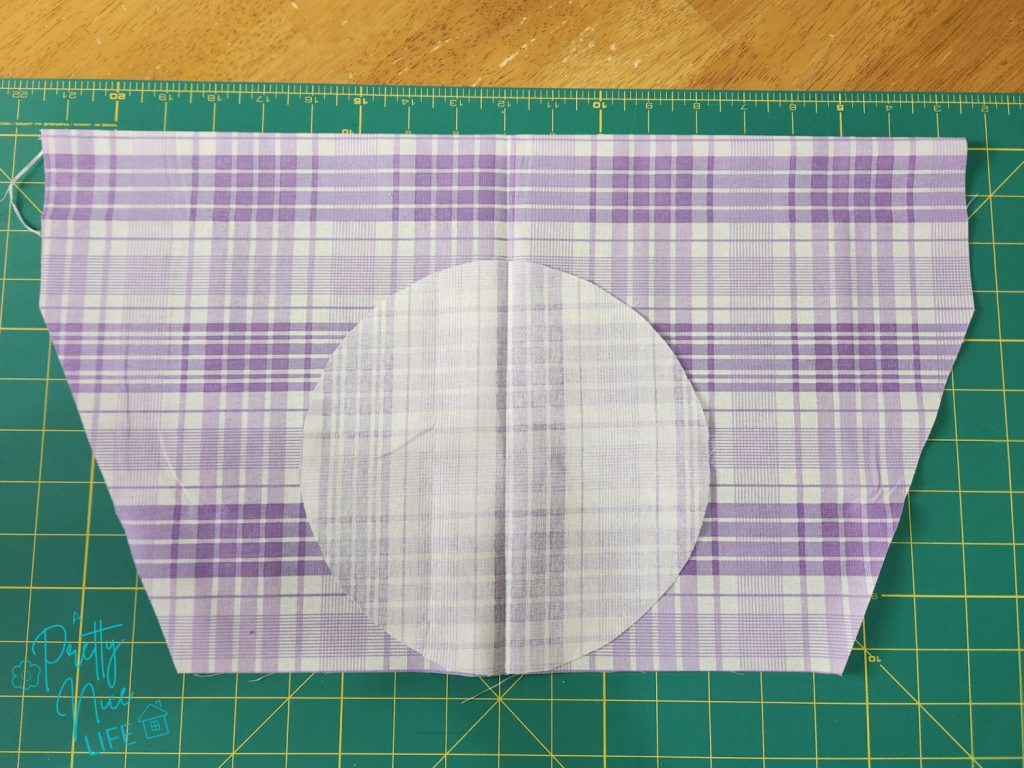
Circle: Cut one circle to your recorded circle size.
Side panels: Cut a rectangle that is Measurement T wide and Measurement H tall. Cut through two layers of fabric at once so both panels are identical.
Fold the rectangle in half lengthwise and press. Mark your transition line down from the top edge on the open (unfolded) side. Measure half of Measurement B from the fold along the bottom edge and mark. Draw a diagonal line connecting the two marks, then cut. When you unfold, you’ll have two perfectly mirrored side panels.
Tip: See the worksheet for more detailed cutting instructions.
Step 3: Sew Your Easter Basket Liner
Press Hems Before You Sew
Before sewing anything together, press all your hems while the fabric is flat. It’s so much easier to do it before you sew.
For the top hem, fold down ½” and press, then fold down another ½” and press. For each of the four handle opening edges, fold over ¼” and press, then fold over another ¼” and press. Don’t sew yet — just set the creases.
Hem the Open Handle Edges
You now have four raw edges that aren’t sewn — two on each side of the liner, where it will open around the basket handles. Hem each of these with a simple double fold: fold over about 1/4″, press, fold again, and sew.
Make and Attach Your Ties
You’ll need four ties total — one for each open edge where the liner goes around the handles. You can use ribbon, or make your own fabric ties.
For fabric ties: cut strips about 1″ wide and 9″–12″ long. Fold in half lengthwise, press, fold the raw edges in toward the center crease, and topstitch. Or use ribbon if you prefer a quicker finish!
Lay a tie along the top of each panel, parallel to the top edge, with about 1″ tucked onto the first ½” fold. Sew securely with a small rectangle of stitches and backstitch well — these ties will be pulled.
Sew the Top Hem
Now that your ties are placed, it’s time to finish the top hem. Fold the top edge over that last 1/2″ to encase the raw edge and the ties. With your stitch-length still set to 3.5, topstitch along the folded edge all the way across the top of each panel.
Sew the Side Panels Together
Place your two panels right sides together, lining up the edges. Pin or clip the diagonal sections on both sides. Starting at the transition line, backstitch and sew with a 3/8″ seam allowance down toward the bottom, backstitching at the end too. Repeat on the other side.
Sew the Bottom Circle
This is the trickiest step, but take it slowly and you’ll be just fine. Match up the center crease in your circle with the two seams you just sewed on the side panels, right sides together. Pin in place. Now match the other center crease with the center creases on your side panels and pin those too. Pin each quarter one more time. (You can use clips or wash-away basting tape instead of pins.)
With the circle side on the bottom, against the feed dogs, sew all the way around with a 3/8″ seam allowance. Focus on keeping only the fabric directly under the needle flat; the rest will bunch up and look wonky, and that’s completely normal. I sew slowly at this point and sometimes turn the wheel manually to ensure my edges are lining up. When I’m finished, if I see a section I didn’t do perfectly, I remind myself this is not an heirloom; it’s an Easter basket lining.
Fit Your Liner and Tie the Bows
Drop your finished liner into the basket, bring the sides up and over the rim, and thread the open edges around the handles. Tie each pair of ties into a bow on the outside of the basket.
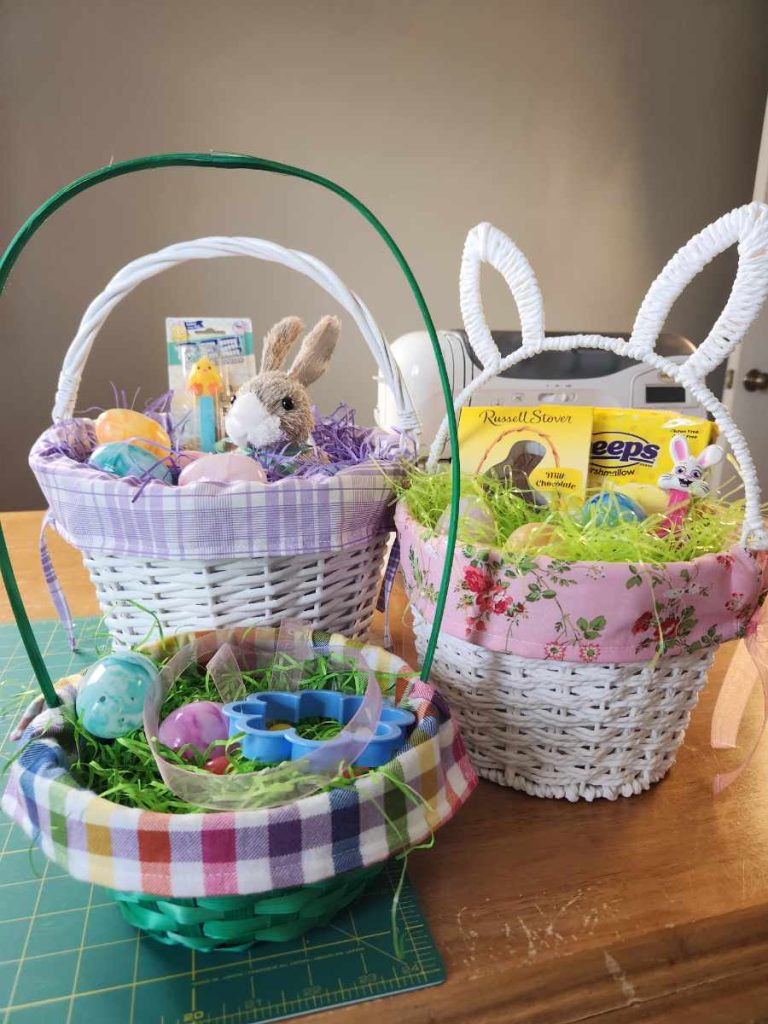
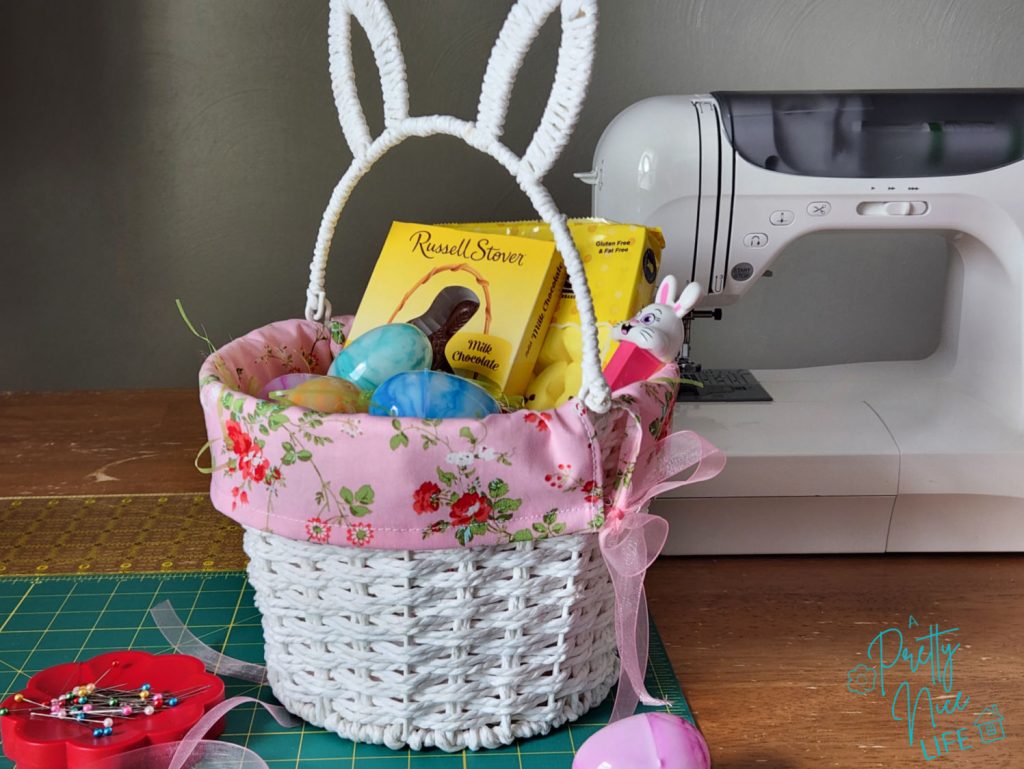
Fill with Easter grass, eggs, and treats — and enjoy your beautifully lined Easter basket!
* Why no seam allowances for Measurement B?
When we sew the circle to the side panels, the seam is sewn 3/8” in from the edge of the circle — which makes the effective circle slightly smaller than the cut size. Normally we’d subtract that from our calculation. But when sewing the two side panels together, each panel also loses 3/8” at the seam — which means we’d need to add it back. Since we’re subtracting and adding the same amount, they cancel each other out perfectly, and the math simplifies to just: bottom diameter × 3.14 ÷ 2.
Printable Easter Basket Liner Worksheet
PIN: Save this tutorial for next Easter — or make one for every season!